Integrate Socket.IO and React components to create a simple chat client app
In this post, I’ll share some code to integrate Socket.IO with React components to create a simple chat client app. I used a Yeoman generator for ReactJS and Webpack to scaffold the frontend, React-Bootstrap for the CSS/layout framework, and Express for the backend.
First I created the Express/Socket.IO backend.
mkdir backend && cd $_

# install express
npm install --save express

# install socket.io
npm install --save socket.io
This is the entirety of the backend, new file: backend/app.js. This app handles the socket events for connection, disconnection, and sending/receiving of messages. More documentation about Socket.IO can be found here.
var app = require('express')()
var server = require('http').Server(app)
var io = require('socket.io')(server)

server.listen(3000)

io.on('connection', function(socket){
  // console.log('user connected')

  socket.on('disconnect', function(){
    // console.log('user disconnected')
  })

  socket.on('chat', function(data){
    // console.log('message: ' + data)
    io.emit('chat', data)
  })
})
To start the backend, execute: node app.js
Next I scaffolded the frontend.
mkdir frontend && cd $_

# install generator
npm install -g yo generator-react-webpack

# scaffold React project with webpack integration
yo react-webpack

# add bootstrap components
npm install --save react-bootstrap

# add socket.io-client package
npm install --save socket.io-client
Include the Bootstrap CSS from CDN by adding the stylesheet before the closing </head> tag in frontend/src/index.html:
<link rel="stylesheet" href="https://maxcdn.bootstrapcdn.com/bootstrap/latest/css/bootstrap.min.css">I revised the main React component to include a Chat component. Edited file: frontend/src/components/Main.js:
import React from 'react'
import Chat from 'components/Chat.js'

class AppComponent extends React.Component {
  render() {
    return (
      <Chat />
    )
  }
}

AppComponent.defaultProps = {
}

export default AppComponent
Below is the main Chat component (file: frontend/src/components/Chat.js). The render method conditionally: a) displays a ChatName form, for a user to enter their name and join the chat; or b) shows the ChatRoom component which allows them to send and receive messages. The ChatName component handles the submission of the user name by passing a callback (handleSubmitName) as a “prop” to the component.
import React from 'react'
import { Grid } from 'react-bootstrap'
import ChatName from './ChatName.js'
import ChatRoom from './ChatRoom.js'

require('./Chat.css')

class ChatComponent extends React.Component {

  constructor(props) {
    super(props)
    this.state = {
      name: null
    }

    this.handleSubmitName = this.handleSubmitName.bind(this)
  }

  render() {
    return (
      <Grid>
        {!this.state.name &&
          <ChatName
            handleSubmitName={this.handleSubmitName}
          />
        }
        {this.state.name &&
          <ChatRoom
            name={this.state.name}
          />
        }
      </Grid>
    )
  }

  handleSubmitName(name) {
    this.setState({
      name: name
    })
  }
}
export default ChatComponent
Here is the ChatName component which uses React-Bootstrap components to build a simple form (file: frontend/src/components/ChatName.js). As the user types into the Name text input, an onChange callback is used to set the state of the component (this.setName). When the form is submitted, the props callback is used to propagate changes to the parent Chat component.
import React from 'react'
import { FormGroup, ControlLabel, FormControl, Form, Button } from 'react-bootstrap'

class ChatNameComponent extends React.Component {

  constructor(props) {
    super(props)
    this.state = {
      name: null
    }

    this.setName = this.setName.bind(this)
    this.handleSubmit = this.handleSubmit.bind(this)
  }

  render() {
    return (
      <Form inline onSubmit={this.handleSubmit}>
        <FormGroup>
          <ControlLabel>Name</ControlLabel>{' '}
          <FormControl
            id="name"
            type="text"
            label="Name"
            placeholder="Enter your name"
            onChange={this.setName}
            autoComplete="off"
          />
        </FormGroup>
        <Button type="submit">Join Chat</Button>
      </Form>
    )
  }

  setName(event) {
    this.setState({
      name: event.target.value
    })
  }

  handleSubmit(event) {
    event.preventDefault()
    this.props.handleSubmitName(this.state.name)
  }
}

export default ChatNameComponent
After the user has entered their name, the state change causes the render method to remove the ChatName form, and display the ChatRoom component. In the component constructor, a new socket is established to the backend. When the component is mounted (componentDidMount), the user is subscribed to “chat” messages (this.socket.on('chat'...), and when the socket receives new messages, they are pushed to component state. When the user enters a message and submits the form, the message (user name, message, and a timestamp) is sent as JSON to the backend (this.socket.emit('chat'...). Contents of file frontend/src/components/ChatRoom.js:
import React from 'react'
import { FormGroup, ControlLabel, FormControl, Form, Button } from 'react-bootstrap'
import io from 'socket.io-client'
import ChatTable from './ChatTable.js'

class ChatRoomComponent extends React.Component {

  constructor(props) {
    super(props)

    this.state = {
      messages: [],
      newMessage: ''
    }

    this.socket = io('http://localhost:3000')
    this.setNewMessage = this.setNewMessage.bind(this)
    this.handleSubmit = this.handleSubmit.bind(this)
  }

  componentDidMount() {
    this.socket.on('chat', message => {
      message.key = JSON.stringify(message)
      this.setState((prevState) => {
        let messages = prevState.messages
        messages.push(message)
        {
          messages: messages
        }
      })
    })
  }

  render() {
    return (
      <div>
        <Form inline onSubmit={this.handleSubmit}>
          <FormGroup>
            <ControlLabel>Message</ControlLabel>{' '}
            <FormControl
              id="message"
              type="text"
              label="Message"
              placeholder="Enter your message"
              onChange={this.setNewMessage}
              value={this.state.newMessage}
              autoComplete="off"
            />
          </FormGroup>
          <Button type="submit">Send</Button>
        </Form>

        <ChatTable messages={this.state.messages} />
      </div>
    )
  }

  componentWillUnmount() {
    this.socket.close()
  }

  setNewMessage(event) {
    this.setState({
      newMessage: event.target.value
    })
  }

  handleSubmit(event) {
    event.preventDefault()
    this.socket.emit('chat', {
      name: this.props.name,
      message: this.state.newMessage,
      timestamp: new Date().toISOString()
    })
    this.setState({
      newMessage: ''
    })
  }
}

export default ChatRoomComponent
All received messages are stored in the Chat component state, and passed to the ChatTable component as a prop to be rendered. Contents of file: frontend/src/components/ChatTable.js
import React from 'react'
import { Table } from 'react-bootstrap'

class ChatTableComponent extends React.Component {

  constructor(props) {
    super(props)
  }

  render() {
    return (
      <Table striped hover>
        <tbody>
          {this.props.messages.map( message =>
            <tr key={message.key}>
              <td className="name-column">{message.name}</td>
              <td>{message.message}</td>
            </tr>
          )}
        </tbody>
      </Table>
    )
  }
}

export default ChatTableComponent
In addition, I added a bit of CSS to format the tabular layout. file: frontend/src/components/Chat.css
table.table td.name-column {
white-space: nowrap;
width: 1%;
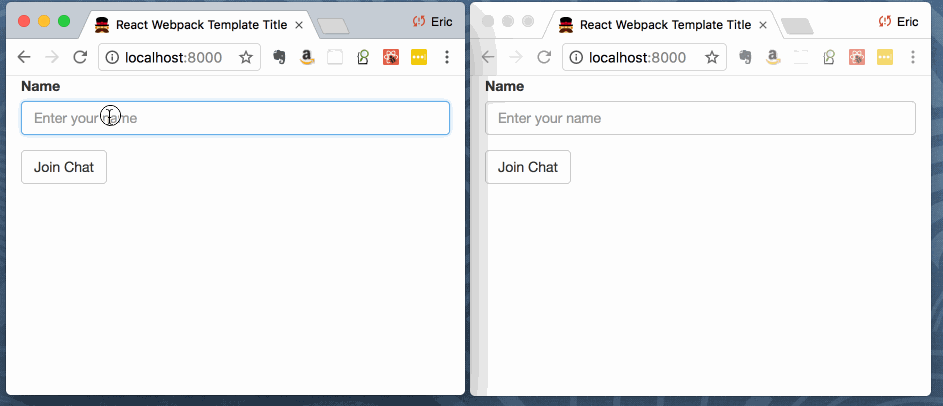
}The frontend can be started via: npm start, and accessible at http://localhost:8000. I opened two browser windows/tabs to test:
To integrate these services with a simple Docker Compose configuration:
file: backend/Dockerfile:
FROM node:8.9.4

RUN mkdir /backend
WORKDIR /backend
ADD package.json /backend/
ADD package-lock.json /backend/
RUN npm install
file: frontend/Dockerfile:
FROM node:8.9.4

RUN mkdir /frontend
WORKDIR /frontend
ADD package.json /frontend/
ADD package-lock.json /frontend/
RUN npm install
file: docker-compose.yml:
version: '2'
services:
  backend:
    build:
      context: ./backend
      dockerfile: Dockerfile
    command: "node app.js"
    volumes:
      - ./backend:/backend
    ports:
      - "3000:3000"
    working_dir: /backend
  frontend:
    build:
      context: ./frontend
      dockerfile: Dockerfile
    command: "npm start"
    depends_on:
      - backend
    environment:
      - API_HOST=backend
    links:
      - backend
    ports:
      - "8000:8000"
    working_dir: /frontend
    volumes:
      - ./frontend:/frontend
To build & run in Docker containers:
docker-compose build && docker-compose up