Create an iOS iPad application with a Rails JSON API backend
In this tutorial I’ll show how I created an iOS app to make a JSON API request to a Rails app and show the content as images in the iPad simulator.
In my rails app model file, I defined an “as_json” method to format the JSON output. file: app/models/image.rb
def as_json(options={})
  {
    :thumb_path => self.upload.url(:thumb),
    :image_desc => self.description.blank? ? self.title : "#{self.title}\n#{self.description}",
    :large_path => self.upload.url(:large),
  }
end
In my images controller, I setup my index method for JSON output. file: app/controllers/images_controller.rb
class ImagesController < ApplicationController

  def index
    // ... snip...
    respond_to do |format|
      format.html {  }
      format.json { render json: @images }
    end

  end

end
Onto Xcode. I created a new project:
- File > New > Project
- iOS > Single View Application; Next
I entered the following project options:
- Product Name: Pictures
- Organization Name: self
- Company Identifier: com.self
- Class Prefix: Pictures
- Devices: iPad
- Use Storyboards: yes
- User Automatic Reference Counting: yes
- Include Unit Tests: (optional, not used in this tutorial)
Click Next; Choose Location; Click Create
For this project I decided to use CocoaPods to manage my third party objc libraries. In this case, primarily AFNetworking.
In the terminal, go to dir that contains the new .xcodeproj example: /Users/Eric/Documents/Objective-C/Pictures
Create new file: .rvmrc (if you’re using RVM)
rvm use --create ruby-1.9.3@iOS.PicturesCreate new Gemfile with contents:
source 'https://rubygems.org'
gem 'cocoapods'
Execute bundle to fetch gems
bundleCreate new Podfile with contents:
platform :ios, '6.0'
pod 'FMDB'
pod 'AFNetworking'
xcodeproj 'Pictures.xcodeproj'
Execute pod install to get objc libraries and setup Xcode workspace
pod installYou should now have the following file structure:
$ ls -1
Gemfile
Gemfile.lock
Pictures
Pictures.xcodeproj
Pictures.xcworkspace
Podfile
Podfile.lock
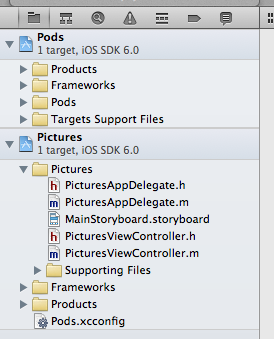
PodsFrom now on, open “Pictures.xcworkspace” instead of “Pictures.xcodeproj”. You’ll see the following structure:
To revise the default storyboard and add a new collection view controller:
- click on MainStoryboard.storyboard
- click on Pictures View Controller, and press delete
Drag a Collection View Controller onto the canvas
Edit PicturesViewController.h
// change:
@interface PicturesViewController : UIViewController
// to:
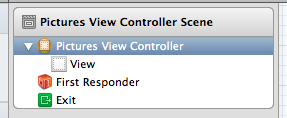
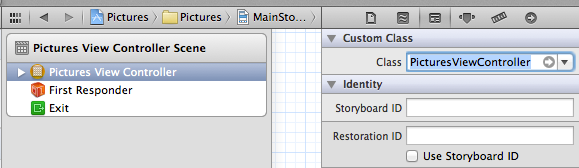
@interface PicturesViewController : UICollectionViewControllerClick on MainStoryboard.storyboard. Click on Collection View Controller (in Collection View Controller Scene). In the Utilities region, click on Identity inspector, enter “PicturesViewController” for the custom class.
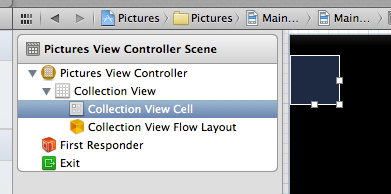
Click on Collection View Cell.
File » New » File… » in iOS » Cocoa Touch » Objective-C class » Next
- Class: PicturesCollectionViewCell
- Subclass of: UICollectionViewCell
- Next » Create
The above commands will create the files: PicturesCollectionViewCell.h and PicturesCollectionViewCell.m
Click on PicturesViewController.m, add:
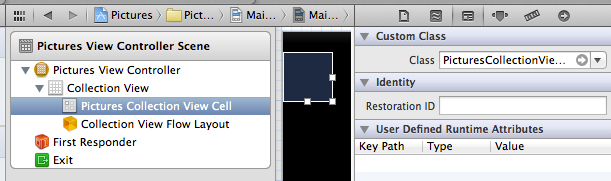
#import "PicturesCollectionViewCell.h"Click on MainStoryboard.storyboard. Click on Collection View Cell in Pictures View Controller Scene. In the Utilities region, click on Identity inspector, enter “PicturesCollectionViewCell” for the custom class
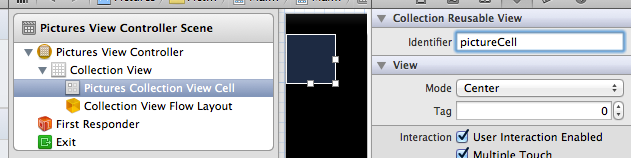
Click on Pictures Collection View Cell in Pictures View Controller Scene. In the Utilities region, click on Attributes inspector, under Collection Reusable View, enter “pictureCell” in the Identifier field.
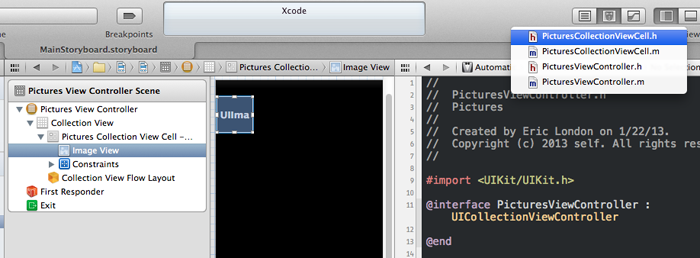
Drag a new Image View object inside the collection view cell.
Click on the button to show the Assistant editor. This will allow you to connect elements from the interface builder to code in your classes. In the Pictures View controller scene, click on Image View. In the code window to the right, you should see the PicturesViewController.h file. You’ll want to change that to the PicturesCollectionViewCell.h header file. Clicking on the class name will allow you to change the active file.
Hold down the control key and drag UIImage view object to the PicturesCollectionViewCell.h header file; release inside the @interface and @end lines of code.
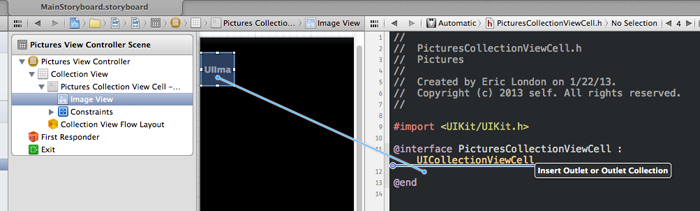
In the popup, enter:
- Connection: Outlet
- Name: pictureImageView
- Type: UIImageView
- Storage: Weak
Click Connect.
The above commands will add the following IBOutlet code:
@property (weak, nonatomic) IBOutlet UIImageView *pictureImageView;Now it’s time to add the guts of the view controller code. Click on PicturesViewController.m file.
TIP: With the Utilities View open, click on the Quick Help tab. If you click on “PicturesViewController” in the @interface PicturesViewController () line of code, the quick help section will provide a reference link to the class that the PicturesViewController inherits from: UICollectionViewController. Click on “UICollectionViewController Class Reference” link. In the “Conforms to” section at the top, click on UICollectionViewDataSource. As noted in the documentation, “An object that adopts the UICollectionViewDataSource protocol is responsible for providing the data and views required by a collection view.”, so let’s add those instance methods (many are marked as required). You can copy and paste the instance method declarations directly into your code, or simply start to type the method name and use Xcode’s autocomplete functionality.
Add (or update) the following methods to the PicturesViewController.m file, before the closing @end line:
- (NSInteger)numberOfSectionsInCollectionView:(UICollectionView *)collectionView
{
    return 1;
}

- (NSInteger)collectionView:(UICollectionView *)collectionView numberOfItemsInSection:(NSInteger)section
{
    return 20;
}

- (UICollectionViewCell *)collectionView:(UICollectionView *)collectionView cellForItemAtIndexPath:(NSIndexPath *)indexPath
{
    PicturesCollectionViewCell *cell = [collectionView dequeueReusableCellWithReuseIdentifier:@"pictureCell" forIndexPath:indexPath];

    return cell;
}
At this point, you should be able to build and run the program, but you’ll just see a blank (black) screen. The following steps are adjustments I made to better fit my images which are 188px x 188px. Click back on the MainStoryboard.storyboard, and click on Pictures Collection View Cell. Resize the cell to 188px x 188px.
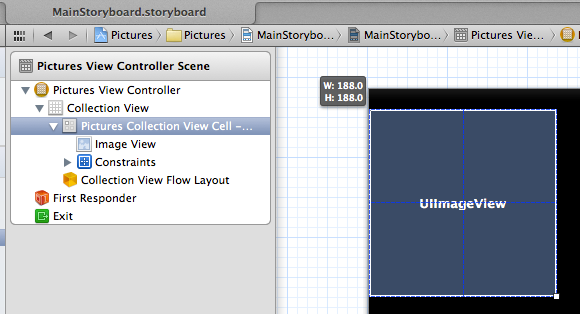
I ensured the Image View was the same dimensions.
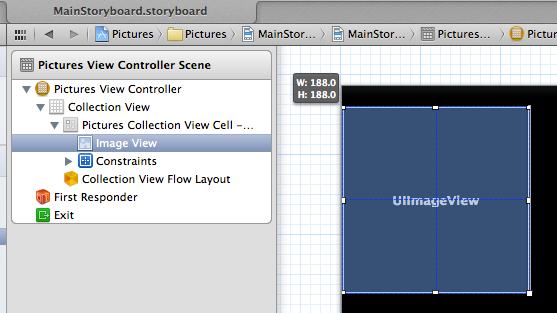
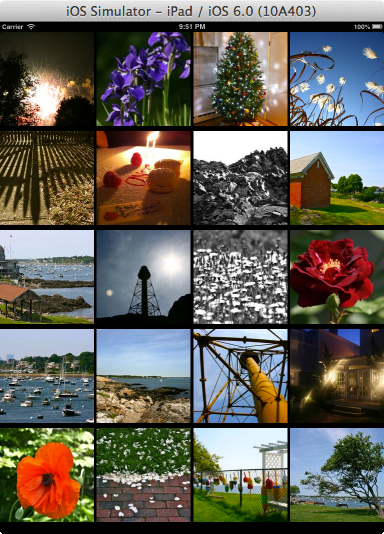
To see the image layout in the simulator, click on the Attributes inspector and set the background for the Image view to white. Click on Collection View and click on size inspector, set the min spacing to 0. The above adjustments yield the following layout if you build/run the project:

Now it’s time to make an API call and populate the image cells asynchronously. I opened PicturesViewController.m and added the following import at the top of the file:
#import "AFJSONRequestOperation.h"I then added the following code to the viewDidLoad method after the line: [super viewDidLoad];
- (void)viewDidLoad
{
    [super viewDidLoad];
	// Do any additional setup after loading the view, typically from a nib.

    // URL/Request
    NSString *imagesUrl = [NSString stringWithFormat:@"http://pics.ericlondon.com/images.json"];
    NSURL *url = [NSURL URLWithString:imagesUrl];
    NSMutableURLRequest *request = [NSMutableURLRequest requestWithURL:[url standardizedURL]];

    // request parameters
    [request setHTTPMethod:@"GET"];
    [request setValue:@"application/x-www-form-urlencoded; charset=utf-8" forHTTPHeaderField:@"Content-Type"];

    // AF json request
    AFJSONRequestOperation *operation = [AFJSONRequestOperation JSONRequestOperationWithRequest:request
        success:^(NSURLRequest *request, NSHTTPURLResponse *response, id JSON) {

            [self.collectionView performBatchUpdates:^{

                NSArray *visibleCells = [self.collectionView visibleCells];

                for (NSInteger i=0; i <[visibleCells count]; i++) {

                    PicturesCollectionViewCell *cell = visibleCells[i];

                    NSString *thumbPath = [NSString stringWithFormat:@"http://pics.ericlondon.com%@", JSON[i][@"thumb_path"]];
                    NSURL *thumbPathURL = [NSURL URLWithString:thumbPath];
                    NSData *imageData = [NSData dataWithContentsOfURL:thumbPathURL];
                    UIImage *image = [[UIImage alloc] initWithData:imageData];
                    cell.pictureImageView.image = image;

                }

            } completion:nil];

        }
        failure:^(NSURLRequest *request, NSHTTPURLResponse *response, NSError *error, id JSON) {
            NSLog(@"ERROR: %@", error);
        }
    ];

    [operation start];

}
The above code makes an asynchronous JSON GET request to the Rails API which returns a JSON array containing image paths. The success block uses an objc block to update the image cells..
Next steps: sell app in Apple AppStore :)