Drupal 7: Creating a Centos server installation for Apache, MySQL, Tomcat, PHP, Drupal, and Solr
In this article I’ll show the commands I have been using to set up a fresh Centos server, configured for Apache, MySQL, PHP, Tomcat, Drupal, and Apache Solr. For my article, I used Parallels to create a virtual machine from the Centos 5.6 64bit ISOs I downloaded. To simply this article, all commands are being executed as root, firewall configurations and performance tweaks are not accounted for.
Once the distribution is installed, the first thing I do is upgrade all packages.
$ yum updateInstall PHP, Apache, and MySQL
$ yum install php53 php53-gd php53-mbstring php53-mysql php53-xml mysql-server httpdSet runlevels for Apache and MySQL
$ chkconfig --level 2345 httpd on
$ chkconfig --level 2345 mysqld on
Install subversion. I chose to use subversion for this article because the Drupal 6 installation works well with svn:externals to fetch the SolrPhpClient library. All subversion commands are connecting to a local subversion repository. If you are using an external server (like Beanstalk), you will have to transpose all commands from using “file://” to “https://”.
$ yum install subversionAdd a new local subversion repository (OPTIONAL).
$ mkdir /var/subversion
$ svnadmin create /var/subversion/example.com
$ svn mkdir file:///var/subversion/example.com/trunk -m "added trunk"
$ svn mkdir file:///var/subversion/example.com/branches -m "added branches"
$ svn mkdir file:///var/subversion/example.com/tags -m "added tags"
Download/setup drush
$ cd /var/www
$ wget http://ftp.drupal.org/files/projects/drush-7.x-4.4.tar.gz
$ tar -xzf drush-7.x-4.4.tar.gz
$ ln -s /var/www/drush/drush /usr/local/bin/drush
Create a vhost location on the server for the Drupal installation.
$ mkdir /var/www/vhosts
$ cd /var/www/vhosts
$ drush dl drupal
$ mv drupal-7.0/ example.com
Integrate the Drupal files with subversion
$ cd /var/www/vhosts/example.com
$ svn co file:///var/subversion/example.com/trunk .
$ svn add * .htaccess
$ svn commit -m "downloaded drupal"
Download the Drupal apachesolr module
# make a folder for contrib modules
$ mkdir /var/www/vhosts/example.com/sites/all/modules/contrib
$ cd /var/www/vhosts/example.com/sites/all/modules/contrib

# note: in the below command, you may be prompted to choose which version of the Solr module to install. I choose option 2 for the Supported version
$ drush dl apachesolr

# commit to subversion
$ cd /var/www/vhosts/example.com/sites/all/modules
$ svn add contrib
$ svn commit -m "added contrib folder and apachesolr module"
Setup MySQL
# start mysql
$ /etc/init.d/mysqld start

# set root password
$ /usr/bin/mysqladmin -u root password 'new-password'

# create new database, user, and set permissions
$ mysql --execute="create database db_example"
$ mysql --execute="grant all privileges on db_example.* to 'example-user'@'localhost' identified by 'some_password'"
Setup Apache vhost
$ cd /etc/httpd/conf.d

# create a new file "example.com.conf", with the contents:

NameVirtualHost *:80

<Directory /var/www/vhosts>
  AllowOverride All
</Directory>

<VirtualHost *:80>
  ServerName example.com
  DocumentRoot /var/www/vhosts/example.com
  ErrorLog logs/example.com-error_log
  CustomLog logs/example.com-access_log common
</VirtualHost>
Reset Apache file permissions. NOTE: you will need a more solid/secure configuration for this!
$ cd /var/www
$ chown -R apache.apache drush*
$ chown -R apache.apache vhosts
Start Apache
$ /etc/init.d/httpd startInstall Drupal via drush
$ cd /var/www/vhosts/example.com

# note: you can set your user 1 username, password, email, etc in the following command if desired. type "drush help si" for more install options
$ drush site-install standard --sites-subdir=example.com --db-url=mysqli://example-user:some_password@localhost/db_example
At this point, you should be able to browse to your site and it will be up and running.
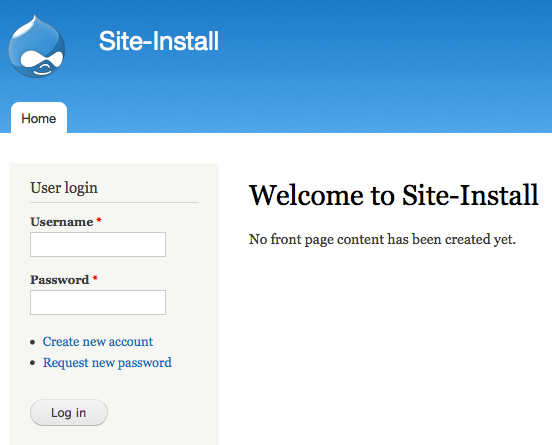
Now we move onto Tomcat and Solr.
Installing Tomcat and Java. The default Centos yum repositories provide Tomcat5. I prefer Tomcat6, so there are some extras steps below and a dependency issue I had to resolve.
# added repo file to get tomcat6:
$ cd /etc/yum.repos.d/
$ wget http://www.jpackage.org/jpackage50.repo
# install Java JDK:
$ yum install java-1.6.0-openjdk
# install tomcat6:
$ yum install tomcat6 tomcat6-admin-webapps tomcat6-webapps
# dang, dependency issue... (!)
java-1.4.2-gcj-compat-1.4.2.0-40jpp.115.x86_64 from base has depsolving problems
--> Missing Dependency: /usr/bin/rebuild-security-providers is needed by package java-1.4.2-gcj-compat-1.4.2.0-40jpp.115.x86_64 (base)
Error: Missing Dependency: /usr/bin/rebuild-security-providers is needed by package java-1.4.2-gcj-compat-1.4.2.0-40jpp.115.x86_64 (base)
You could try using --skip-broken to work around the problem
You could try running: package-cleanup --problems
package-cleanup --dupes
rpm -Va --nofiles --nodigest
The program package-cleanup is found in the yum-utils package.
# Fixing dependency issue (OPTIONAL):
$ mkdir ~/downloads
$ cd ~/downloads
$ wget http://plone.lucidsolutions.co.nz/linux/centos/images/jpackage-utils-compat-el5-0.0.1-1.noarch.rpm
$ rpm -Uvh jpackage-utils-compat-el5-0.0.1-1.noarch.rpm
$ yum install tomcat6 tomcat6-admin-webapps tomcat6-webapps
# setting tomcat runlevels
$ chkconfig --level 2345 tomcat6 on
# starting tomcat
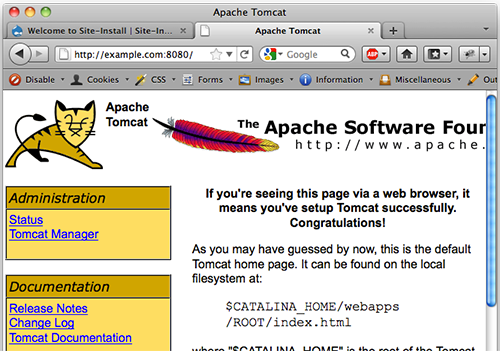
$ /etc/init.d/tomcat6 startAt this point, you should be able to access Tomcat in your browser (http://example.com:8080)
Downloading Solr Java library.
$ cd ~/downloads
# note: you may need to choose a different mirror to download
$ wget http://www.fightrice.com/mirrors/apache//lucene/solr/1.4.1/apache-solr-1.4.1.tgz
$ tar -xzf apache-solr-1.4.1.tgz

# copy/rename solr war file into Tomcat webapps directory
$ cp ~/downloads/apache-solr-1.4.1/dist/apache-solr-1.4.1.war /var/lib/tomcat6/webapps/solr.war

# copy solr files
$ cp -r ~/downloads/apache-solr-1.4.1/example/solr/ /var/lib/tomcat6/solr/
Copying the java war file into the Tomcat webapps folder will create this directory automatically:
/var/lib/tomcat6/webapps/solrCreate Catalina config file to link war file to solr directory:
$ cd /etc/tomcat6/Catalina/localhost

# create new file: "solr.xml", with the contents:

<?xml version="1.0" encoding="UTF-8"?>
  <Context docBase="/var/lib/tomcat6/webapps/solr.war" debug="0" privileged="true" allowLinking="true" crossContext="true">
  <Environment name="solr/home" type="java.lang.String" value="/var/lib/tomcat6/solr" override="true" />
</Context>
Setup Tomcat admin user(s):
# edit file: /etc/tomcat6/tomcat-users.xml, ensure similar contents exist:

<?xml version='1.0' encoding='utf-8'?>
<tomcat-users>
  <role rolename="admin"/>
  <role rolename="manager"/>
  <user username="eric" password="supersecretpassword" roles="admin,manager"/>
</tomcat-users>
Update WEB-INF/web.xml file:
# edit file: /var/lib/tomcat6/webapps/solr/WEB-INF/web.xml, update section to reflect solr path:

<env-entry>
  <env-entry-name>solr/home</env-entry-name>
  <env-entry-value>/var/lib/tomcat6/solr</env-entry-value>
  <env-entry-type>java.lang.String</env-entry-type>
</env-entry>
Copy conf files from Drupal apachesolr module into Tomcat Solr conf directory (overwrite):
$ cp /var/www/vhosts/example.com/sites/all/modules/contrib/apachesolr/protwords.txt /var/lib/tomcat6/solr/conf/
$ cp /var/www/vhosts/example.com/sites/all/modules/contrib/apachesolr/schema.xml /var/lib/tomcat6/solr/conf/
$ cp /var/www/vhosts/example.com/sites/all/modules/contrib/apachesolr/solrconfig.xml /var/lib/tomcat6/solr/conf/
Reset Tomcat permissions/ownership:
$ cd /var/lib
$ chown -R tomcat.tomcat tomcat6/
Restart Tomcat
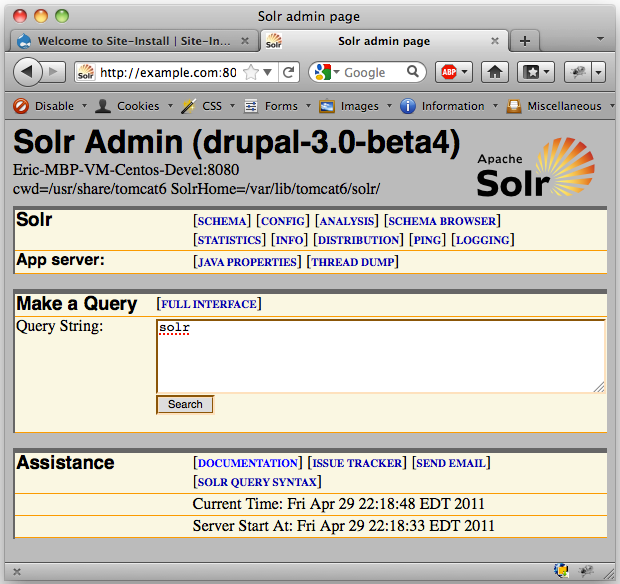
$ /etc/init.d/tomcat6 restartAt this point, you should be able to access the solr/admin tomcat Page (http://example.com:8080/solr/admin)
If things are not working well at this point, check the Tomcat logs:
/var/log/tomcat6/catalina.outAnd, ensure the solr java module is listed in the Tomcat Web Application Manager: http://example.com:8080/manager/html
If all is well, you can now enable the Drupal apachesolr modules:
$ cd /var/www/vhosts/example.com
$ drush en apachesolr apachesolr_search apachesolr_taxonomy apachesolr_access --uri=example.com
Log into your Drupal site. NOTE: default account (via drush): admin/admin
Edit default Apache Solr Host Settings: URL: http://example.com/admin/config/search/apachesolr/server/solr/edit Change url to: http://example.com:8080/solr, and save form.
Go to Drupal search settings page: URL: http://example.com/admin/config/search/settings Change the default search mode to “Apache Solr search”, and save form.
Now, you are ready to test the indexing and integration.
Add a new piece of content to test indexing.
# Example:
# http://example.com/node/add/article
# title: Test Article
# Body: test test test
Browse to solr index page: URL: http://example.com/admin/config/search/apachesolr/index Select: Index queued content, and click on Begin button You should see a status message like: “1 item processed successfully.” and “Number of documents in index: 0 (1 sent but not yet processed)” A few minutes later, refreshing the index page should show: “Number of documents in index: 1”
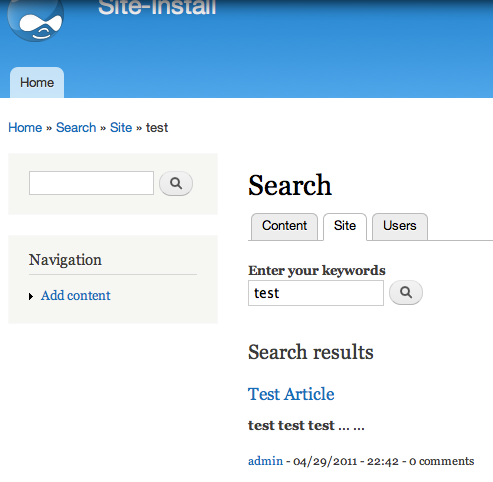
Search for “test” to verify Solr results. URL: http://example.com/search/site/test
You can also review search results via solr/admin URL: http://example.com:8080/solr/admin/ Enter “test” in query string box and click search
Part 2, Multicore Configuration (OPTIONAL)
If you need to run multiple sites off a single Solr Tomcat installation, you can setup multicore..
Copy the multicore xml file into your solr directory:
$ cp ~/downloads/apache-solr-1.4.1/example/multicore/solr.xml /var/lib/tomcat6/solr/Create a new directory for each multisite in the solr directory:
$ mkdir /var/lib/tomcat6/solr/example.comReplicate the solr conf directory into the new multisite directory:
cp -r /var/lib/tomcat6/solr/conf /var/lib/tomcat6/solr/example.com/conf/Update the solr.xml file:
# edit file: /var/lib/tomcat6/solr/solr.xml, added <core> section for each site:
<cores adminPath="/admin/cores">
  <core name="example.com" instanceDir="example.com" />
</cores>
Restart Tomcat
$ /etc/init.d/tomcat6 restartNow your new multicore site will be accessible here: http://example.com:8080/solr/example.com/admin/