Drupal 6: Adding a jQuery Image Carousel to your Node View
In this tutorial I’ll show you how you can add jQuery image carousel functionality to your CCK node. This tutorial requires you to install the following modules:
- cck
- filefield
- imageapi
- imagecache
- imagefield
NOTE: The next few steps assume you have not already setup a content type and ImageCache preset. You can ignore them if you already have.
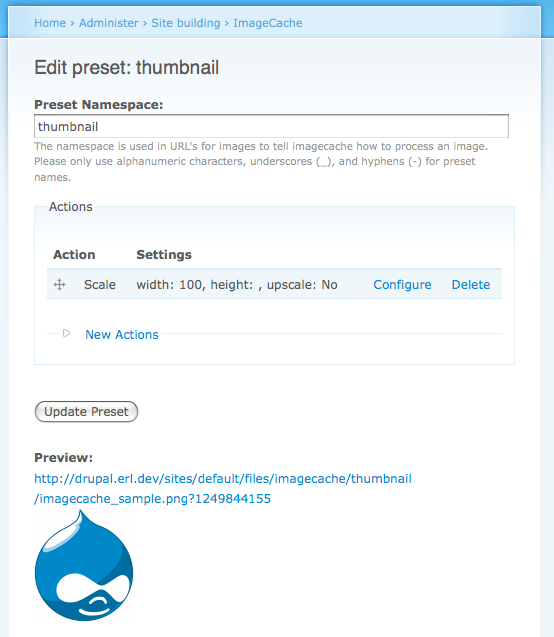
Once you installed the above modules and set permission accordingly, you’ll need to define an ImageCache preset (/admin/build/imagecache/add). I called mine “thumbnail” for this example. I added a “Add Scale” action to set the width to 100 (pixels). This will ensure when you create an image, a thumbnail will be created automatically.
Create a new content type (/admin/content/types/add). I called mine “Carousel” for this example. I then clicked on “Manage Fields” (/admin/content/node-type/carousel/fields) to setup a new Image field. I called my new field “field_images”, selected “File” for field type, and selected “Image” for the form element.
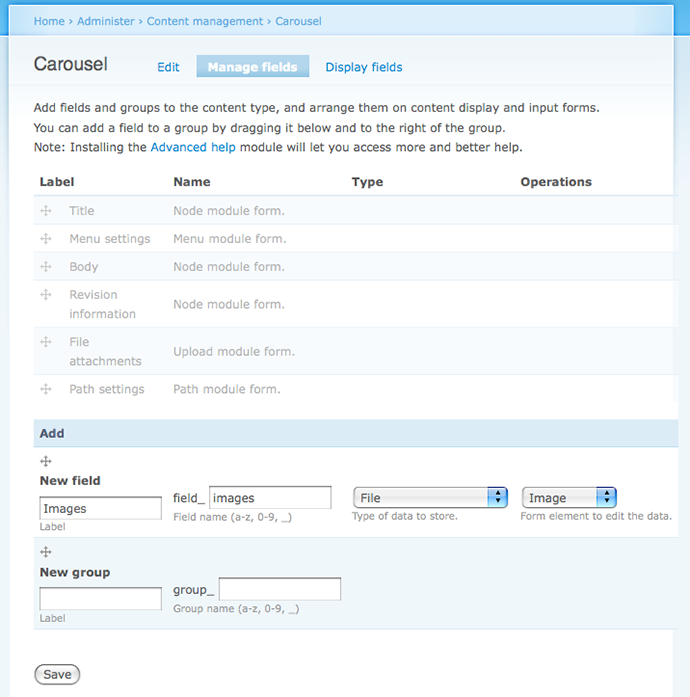
On the next screen, scroll down to the Global fieldset region and enable the “Required” checkbox, and set the “Number of Values” to “Unlimited”. This will allow the user to upload numerous image files to the same CCK field.
Next you’ll want to set which image preset it shown when viewing the node, by clicking on “Display fields” (/admin/content/node-type/carousel/display). I chose the “thumbnail image” preset for both the teaser and full node displays.
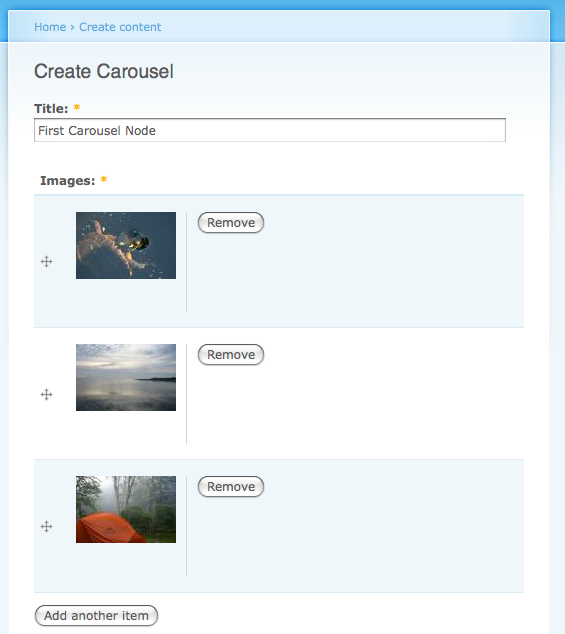
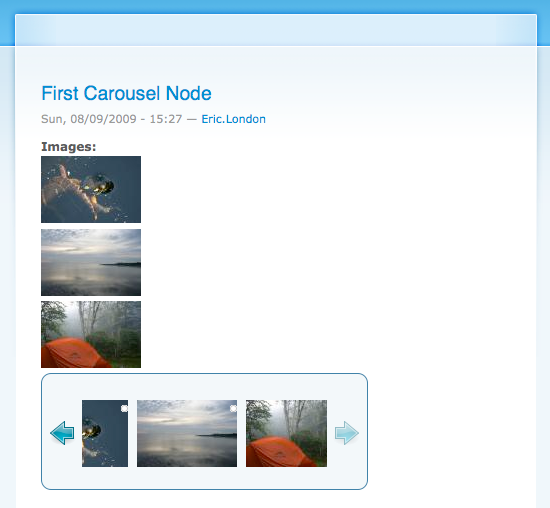
I then created a new carousel node (/node/add/carousel). I used the “Add another item” button to upload three images to this node.
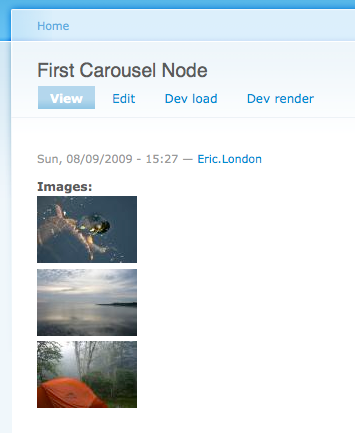
If you view the node, the images will be stacked vertically.
This is where the fun starts. You’ll need to download the jQuery Carousel library (http://sorgalla.com/projects/jcarousel/). I downloaded the jcarousel.zip file and unpacked it. Copy the entire unpacked jcarousel folder into your theme directory.
Now you’ll need to add a preprocess_node function to your template.php file:
<?php
function YOURTHEME_preprocess_node(&$variables) {
// test for carousel node type
if ($variables['type'] == 'carousel') {
// include jCarousel javascript
drupal_add_js(path_to_theme() . '/jcarousel/lib/jquery.jcarousel.js');
// add jquery in enable jQuery carousel on <ul>
$js = "
$(document).ready(function(){
$('#mycarousel').jcarousel();
});
";
drupal_add_js($js, 'inline');
// include jCarousel css
drupal_add_css(path_to_theme() . '/jcarousel/lib/jquery.jcarousel.css');
drupal_add_css(path_to_theme() . '/jcarousel/skins/tango/skin.css');
// loop through images and create an item list
$items = array();
foreach ($variables['field_images'] as $key => $value) {
$items[] = $value['view'];
}
// ensure images exist
if (count($items)) {
// add jQuery carousel html to $content variable
$variables['content'] .= theme('item_list', $items, NULL, 'ul', array('id' => 'mycarousel', 'class' => 'jcarousel-skin-tango'));
}
}
}
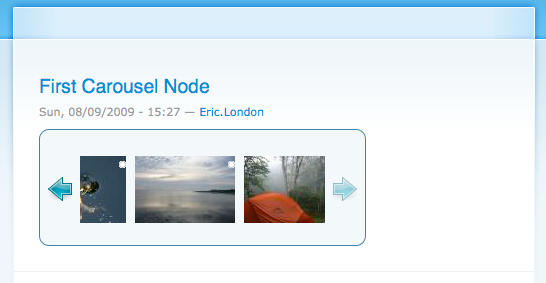
?>The previous code snippet should result in the following:
If you’d like you can hide the old image html by adding a single line of CSS (or by adding more elaborate code in your template preprocess function).
Example:
div.field-field-images {
  display: none;
}
Adding the previous CSS will result in this example:
UPDATE: This blog post is deprecated in favor of: http://drupal.org/project/jcarousel